Deploying Your First Kubernetes Cluster with Deployment🚀
👩💻 Hey there! I'm a DevOps engineer and a tech enthusiast with a passion for sharing knowledge and experiences in the ever-evolving world of software development and infrastructure. As a tech blogger, I love exploring the latest trends and best practices in DevOps, automation, cloud technologies, and continuous integration/delivery. Join me on my blog as I delve into real-world scenarios, offer practical tips, and unravel the complexities of creating seamless software pipelines. Let's build a strong community of tech enthusiasts together and embrace the transformative power of DevOps!
Congratulations on making it to Day 34 of the #90DaysOfDevOps challenge! By now, you've got a good understanding of Kubernetes (often abbreviated as K8s), its architecture, and how to set up a Kubernetes cluster locally using Minikube. Now, let's dive into deploying applications in Kubernetes.
Understanding Kubernetes Deployments🌟
In Kubernetes, Deployment is a powerful resource for managing applications. It provides a declarative way to describe an application's life cycle, including which images to use for the app, the number of replicas, and how to update them over time. Essentially, a Deployment allows you to define your desired application state, and Kubernetes takes care of making it happen.
Here's why Deployments are awesome🔍
Rolling Updates: If you want to release a new version of your app, Deployments allow you to do it smoothly, ensuring there's no downtime. It gradually replaces old replicas with new ones.
Rollbacks: Oops! Did something go wrong with the new version? No worries. You can easily roll back to the previous version with a single command.
Scaling: Need to handle more traffic? Deployments support scaling your application horizontally by adding or removing replicas.
Self-Healing: If a replica fails, Kubernetes will automatically replace it, ensuring your app stays healthy.
Now, let's put this knowledge into practice with a hands-on task.
Task-1: Deploying a Sample Todo-App with Auto-Healing and Auto-Scaling📦
Today's task is all about simplicity but with a significant impact. We will create a Kubernetes Deployment to deploy a sample todo-app. Additionally, we'll set up auto-healing and auto-scaling for the application, two crucial features Kubernetes provides out of the box.
Auto-Healing
Auto-Healing ensures that if a Pod fails or terminates unexpectedly, Kubernetes automatically replaces it to maintain the desired number of replicas. 🏥
Auto-Scaling
Auto-Scaling allows you to automatically adjust the number of replicas based on resource utilization, ensuring that your application can handle increased load without manual intervention. 🚀
Prerequisites:
Verify Minikube's operational status:
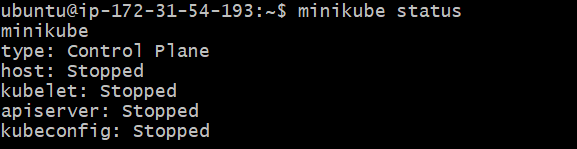
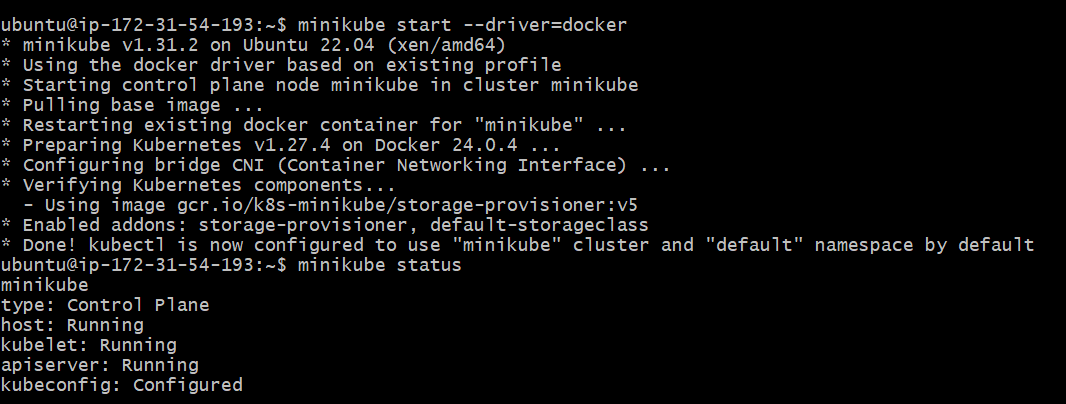
If it is stopped, start it by giving the below command:
minikube start --driver=docker
Here are the steps to create your first deployment:
1. Prepare the Deployment YAML:
To create a Deployment, we need to define its desired state in a YAML file.

A sample deployment.yml file is provided below:
apiVersion: apps/v1
kind: Deployment
metadata:
  name: todo-app
  labels:
    app: todo
spec:
  replicas: 2
  selector:
    matchLabels:
      app: todo
  template:
    metadata:
      labels:
        app: todo
    spec:
      containers:
      - name: todo
        image: rishikeshops/todo-app
        ports:
        - containerPort: 3000
Let's break down each section of the above manifest file:
apiVersion: apps/v1: This line specifies the Kubernetes API version being used. In this case, it's using theapps/v1API version.kind: Deployment: This line defines the Kubernetes resource type being created, which is a Deployment in this case.metadata: This section contains metadata about the Deployment, such as its name and labels. Labels are key-value pairs used to identify and categorize resources.name: todo-app: This is the name assigned to the Deployment resource, which is "todo-app" in this case.labels: Labels are used to tag the Deployment with metadata. In this case, the Deployment is labeled with "app: todo," which can be used for selecting and grouping resources.
spec:The
specsection describes the desired state of the Deployment, including the number of replicas, the selector for identifying pods, and the pod template.replicas: 2: This specifies that the desired number of replicas (instances) of the application is 2. The Deployment will ensure that two identical pods are running at all times.selector: This section specifies how the Deployment identifies the pods it manages.matchLabels: The Deployment selects pods with labels matching the criteria specified here. In this case, it selects pods with the label "app: todo."
template: This section defines the pod template that will be used for creating new pods managed by the Deployment.metadata: This metadata section assigns labels to the pods created from this template. Again, the label "app: todo" is assigned.spec: This spec section describes the pod's specifications, including the containers running inside it.containers: This is an array that can contain multiple containers, but in this case, it contains only one container definition.name: todo: This specifies the name of the container, which is "todo."image: rishikeshops/todo-app: This specifies the Docker image to use for the "todo" container. The image "rishikeshops/todo-app" will be pulled and run in the pod.ports: This section defines the ports that the container exposes.containerPort: 3000: This specifies that the container listens on port 3000.
2. Apply the Deployment:
Once you've customized the deployment.yml file, apply it to your Kubernetes cluster (in this case, Minikube) using the kubectl apply -f deployment.yml command.

3. Verify the deployment status:
kubectl get deployments

That's it! You've just deployed a sample application with auto-healing and auto-scaling features.
By completing this task, you'll not only gain hands-on experience with Kubernetes Deployments but also add another valuable project to your DevOps resume. Keep up the fantastic work, and stay tuned for more DevOps adventures!
